How to Install the NDS Quik-Fix™ Expansion Repair

This video from NDS provides the step-by-step directions for using the Quik-Fix™ repair coupling to repair a broken pipe.
Made of high-impact PVC Type II material in a 1-piece cylinder to avoid leaks, there is no solvent weld necessary with the Quik-Fix repair coupling. It features an internal, high-quality, self-lubricating EDPM O-ring that provides a long life and smooth movement.
Before you get started with your repair, make sure you have the proper materials:
- Quik-Fix Repair Coupling
- Sch 40 Coupling
- PVC Primer and Glue
- Permanent Marker
- Pipe cutter or hacksaw
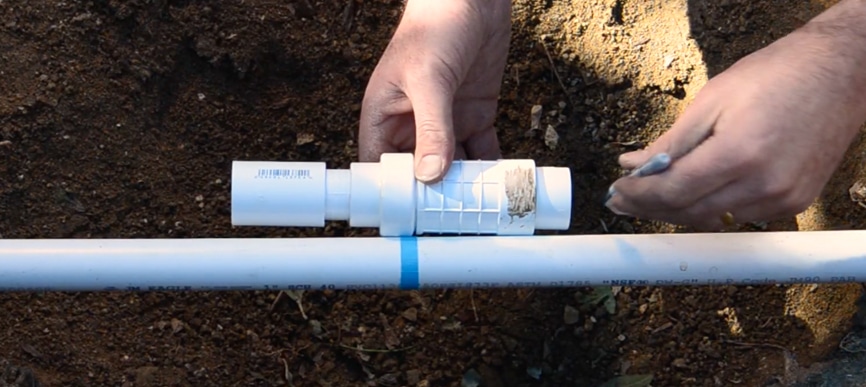
In the clip, the blue line on the pipe represents the crack or break in the pipe that needs repairing.
You will first apply primer and glue to the inside of the sch 40 coupling, and then firmly press the coupling onto the piston end of the Quik-Fix™.
Compress the piston end into the body of the Quik-Fix™.
Hold and center the Quik-Fix™ on the crack or break in the pipe, and use the marker to mark the pipe ½ inch from both ends of the repair coupling.
Use the pipe cutter or hack saw to cut the pipe at the marked points.
BEFORE installing the repair coupling, be sure to remove any dirt and debris from the inside of the pipe.
Apply primer and glue to one side of the pipe. Firmly press the piston/coupling side of the Quik-Fix onto the pipe and rotate ¼ turn to ensure a secure connection.
Next, apply primer and glue to the other side of the pipe. Extend the Quik-Fix™ and slide it onto the pipe and rotate ¼ turn.
If you need additional help with NDS flow management, draining or professional irrigation products, please visit ndspro.com.


